Quickstart Guide
Warning
This quickstart guide is subject to change during the pipeline’s development. New features and ways of operating the pipeline are still being added.
Install
The best way to install soxspipe is to use conda and install the package in its own isolated environment (preferably using Miniforge; a minimal installation for the conda package and environment manager), as shown here:
conda create -n soxspipe python=3.12 soxspipe -c conda-forge
conda activate soxspipe
If you have previously installed soxspipe, a warning will be displayed indicating that a conda environment already exists; select y when prompted to remove the existing environment. This has proven to be the cleanest way to upgrade soxspipe.
To check if the installation was successful, run soxspipe -v. This should return the installation’s version number.
Please refer to the installation section for alternative installation methods for soxspipe.
Demo Data
The demo SOXS data for this quickstart guide are taken from the nights of October 2025 and January 2026. The ‘science’ objects found in the data are actually spectroscopic standard stars taken in science mode.
You can download the data from here.
Alternatively, if you would like to download a different dataset, then naivigate to the ESO Science Archive Facility, select the the dates above and choose SOXS as the instrument you are interested in.
Click on the ‘MarkAll’ button and then ‘Request marked datasets’ (see Fig. 1).
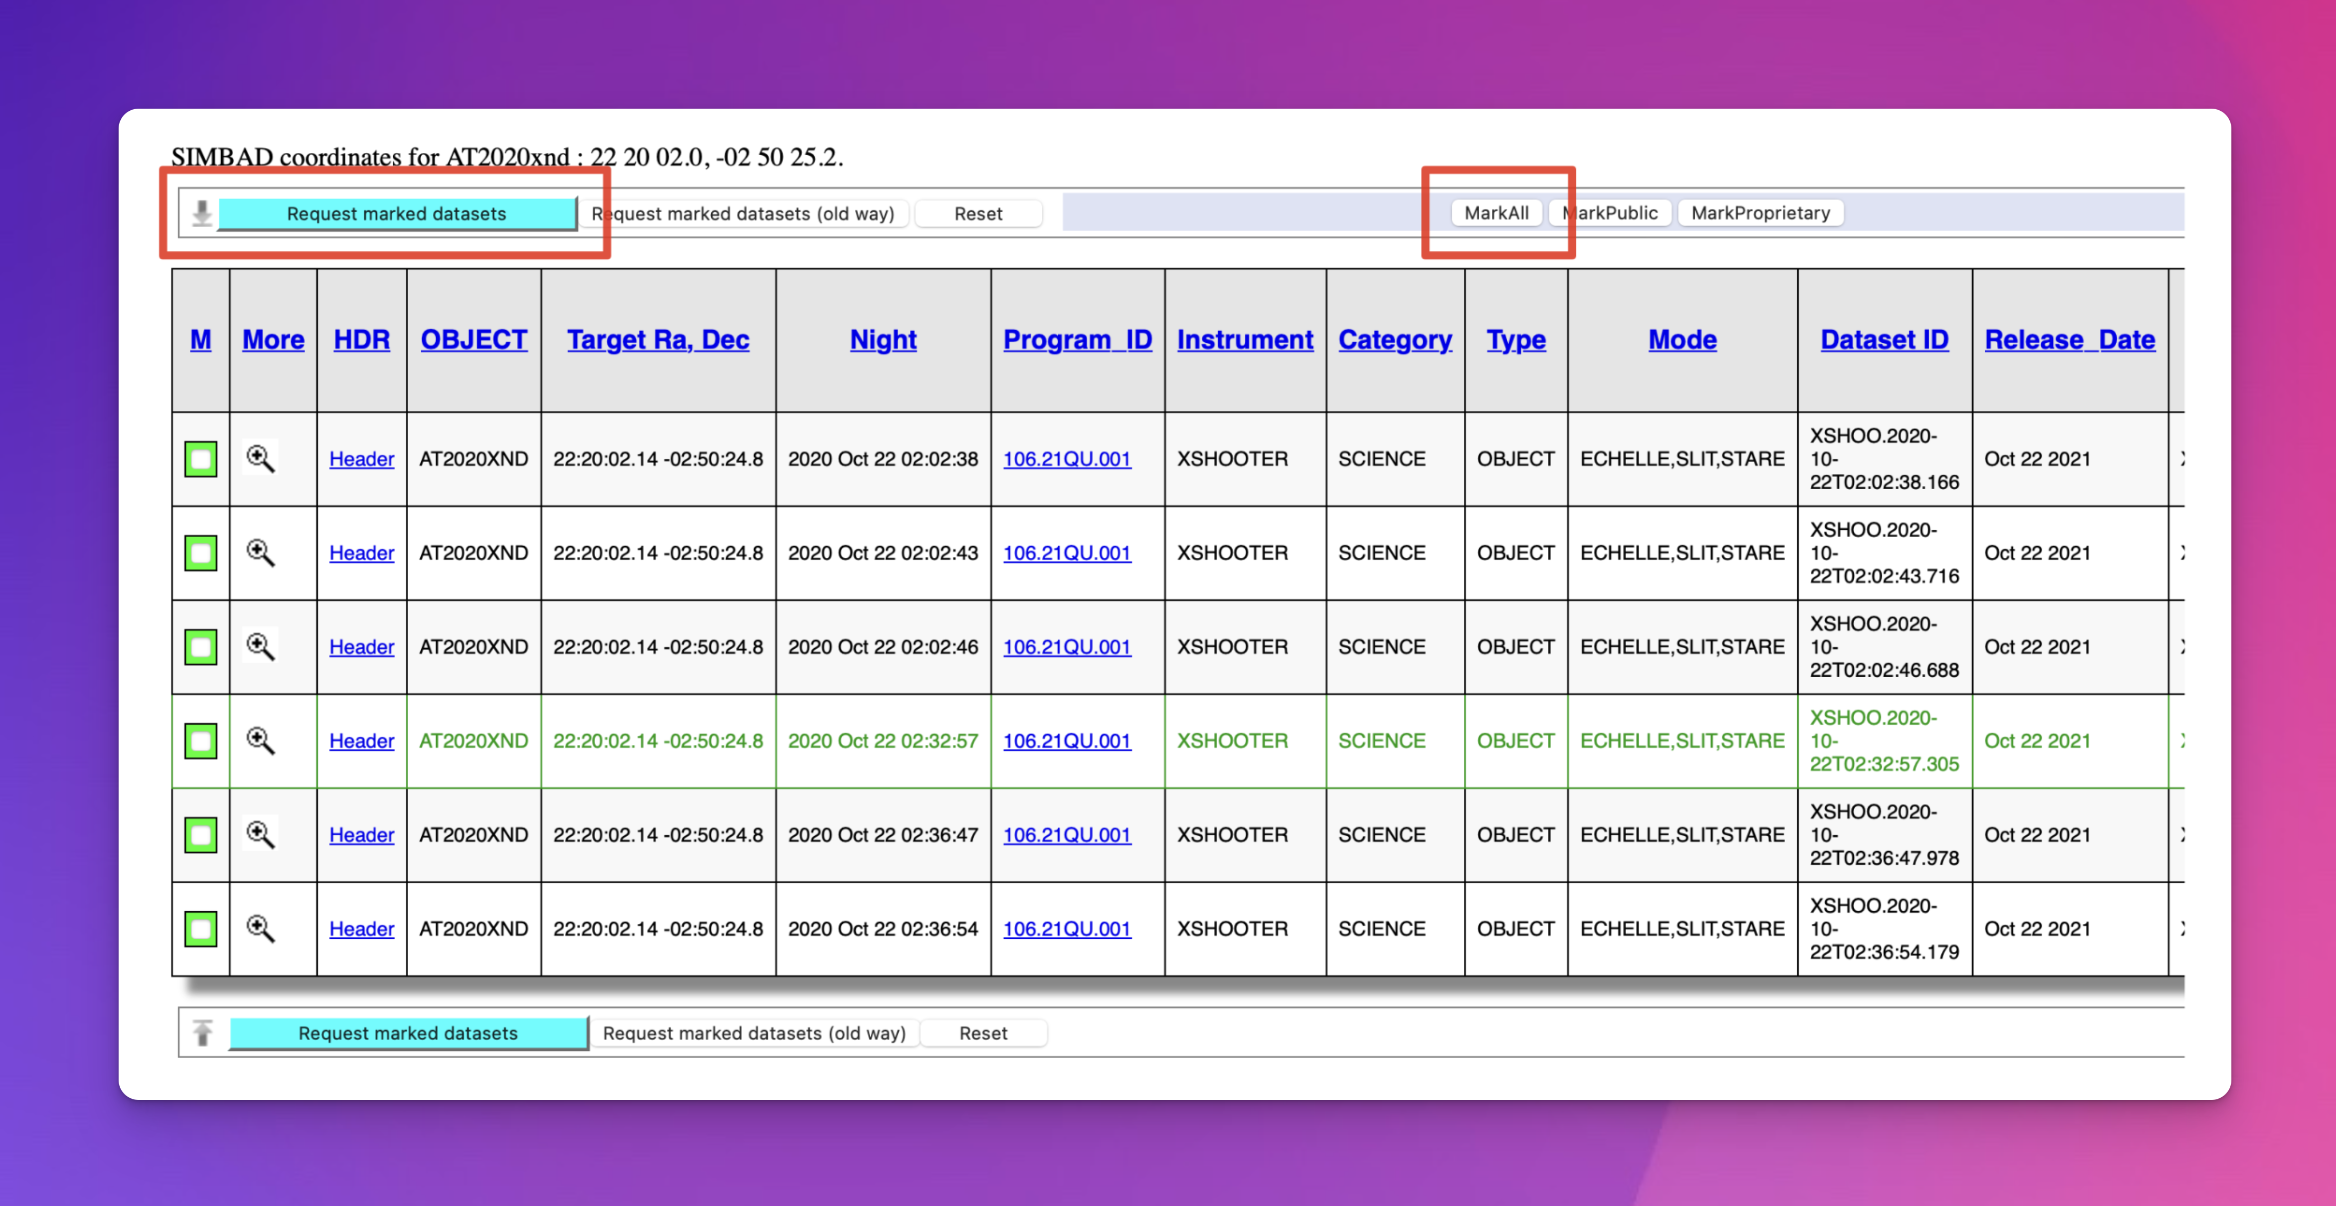
Fig. 1 Mark all of the data and request to download.
Collecting the associated raw calibration frames with the raw science frames is essential. Otherwise, the pipeline will not be able to reduce your data. To do this, click the ‘Run association’ button beside the ‘Associated raw calibrations’ checkbox (shown in Fig. 2). Once the association is completed, the ‘Associated raw calibrations’ checkbox should be checked.
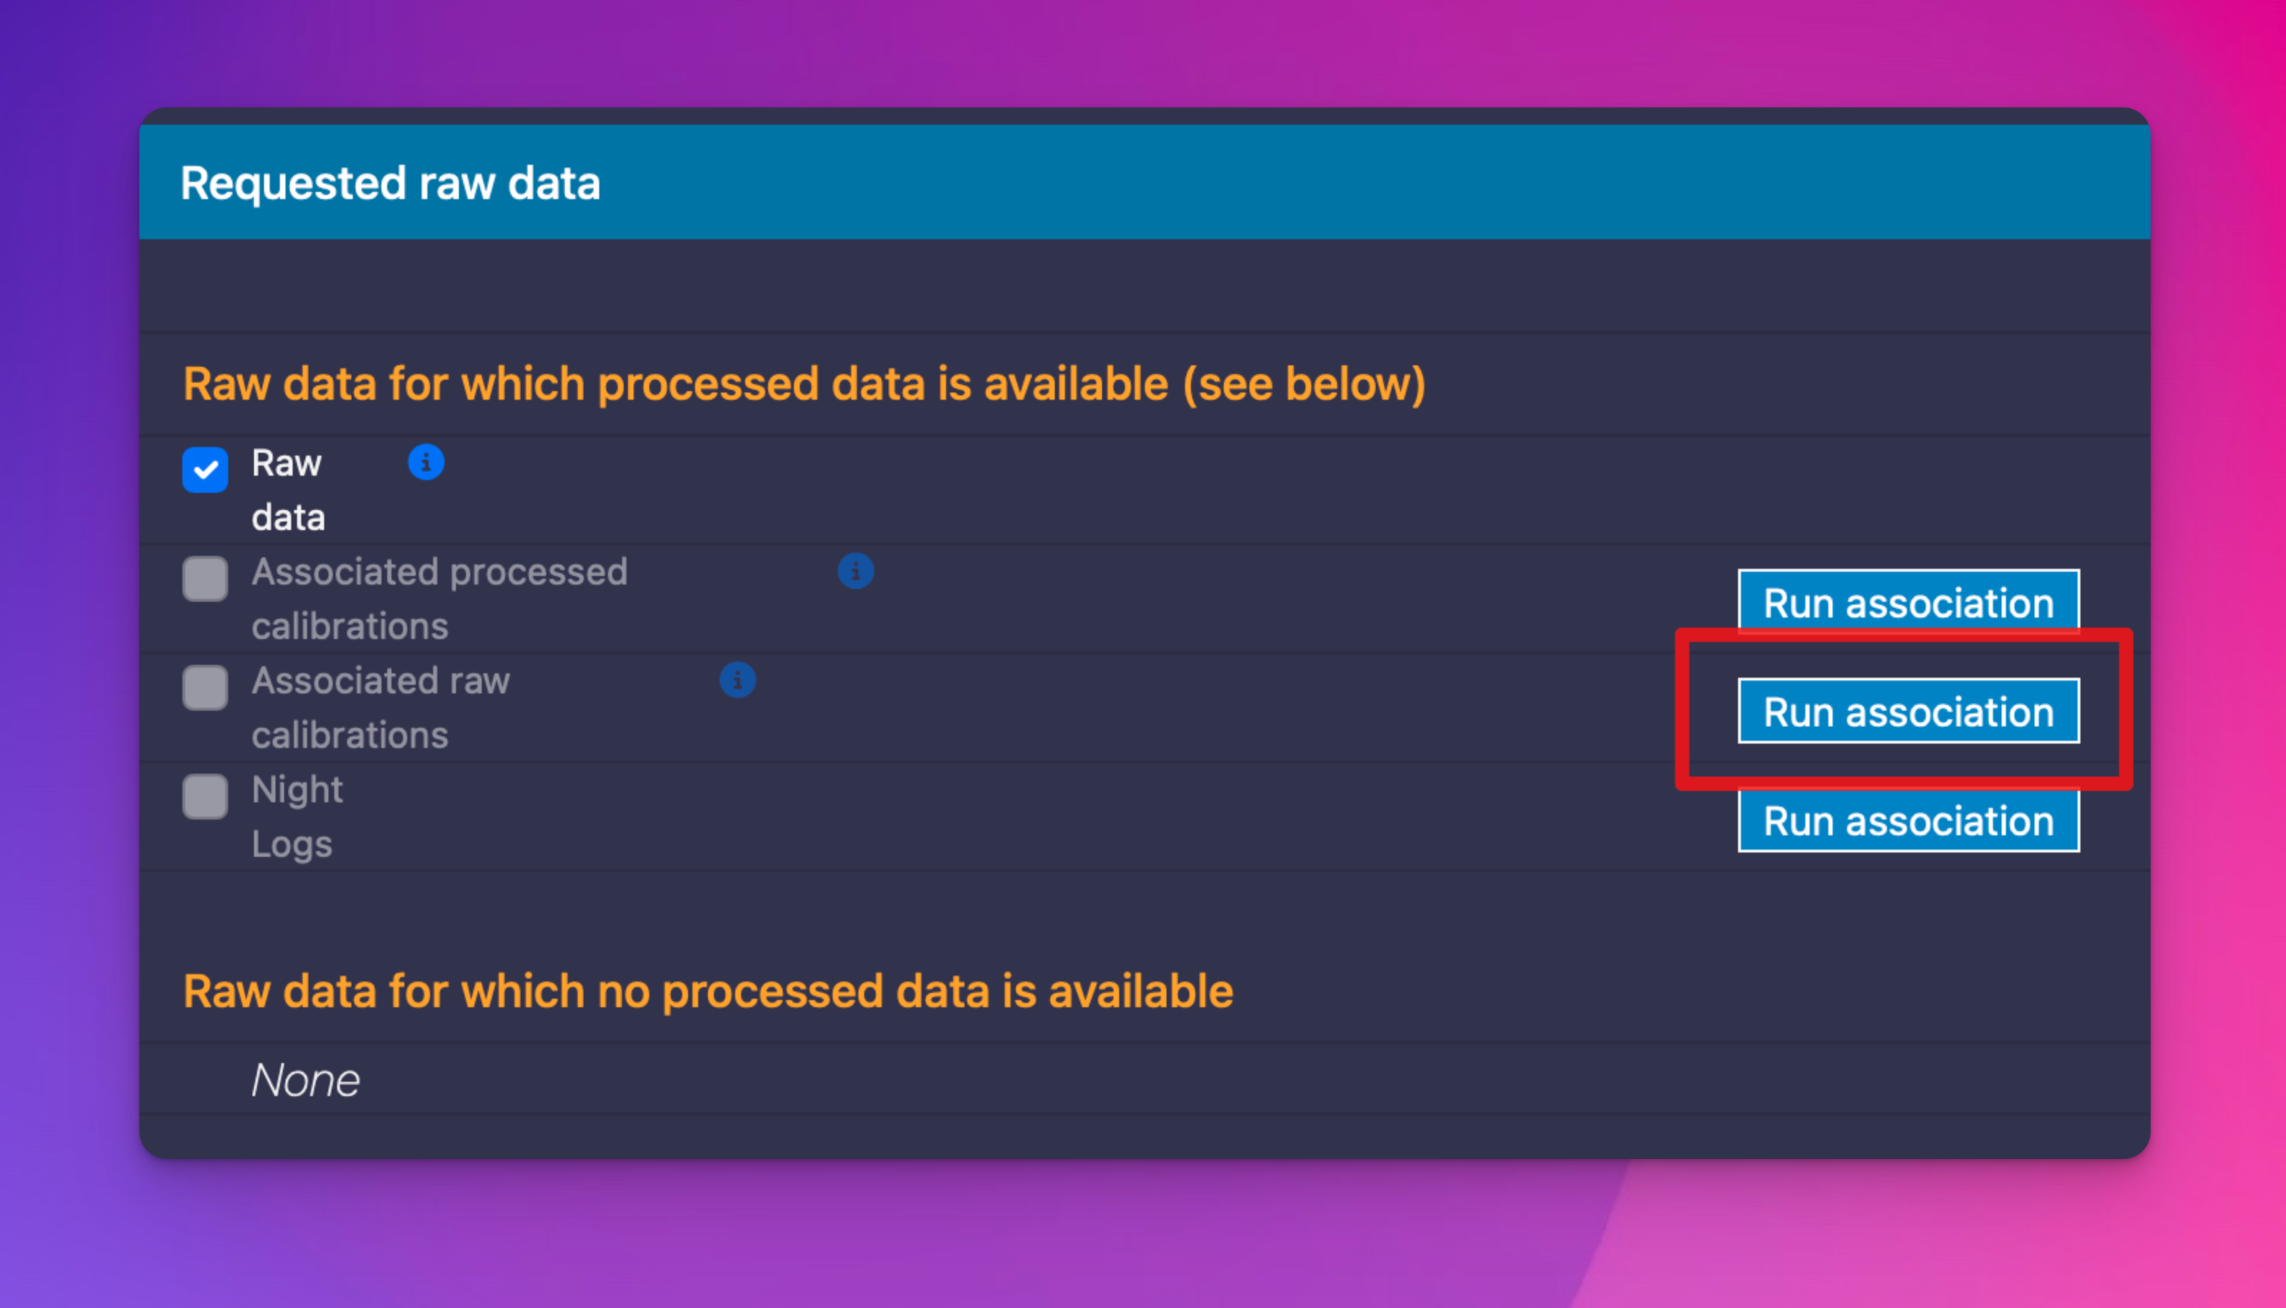
Fig. 2 Download the associated calibration data alongside the science data.
Finally, click the ‘Download ZIP file’ button.
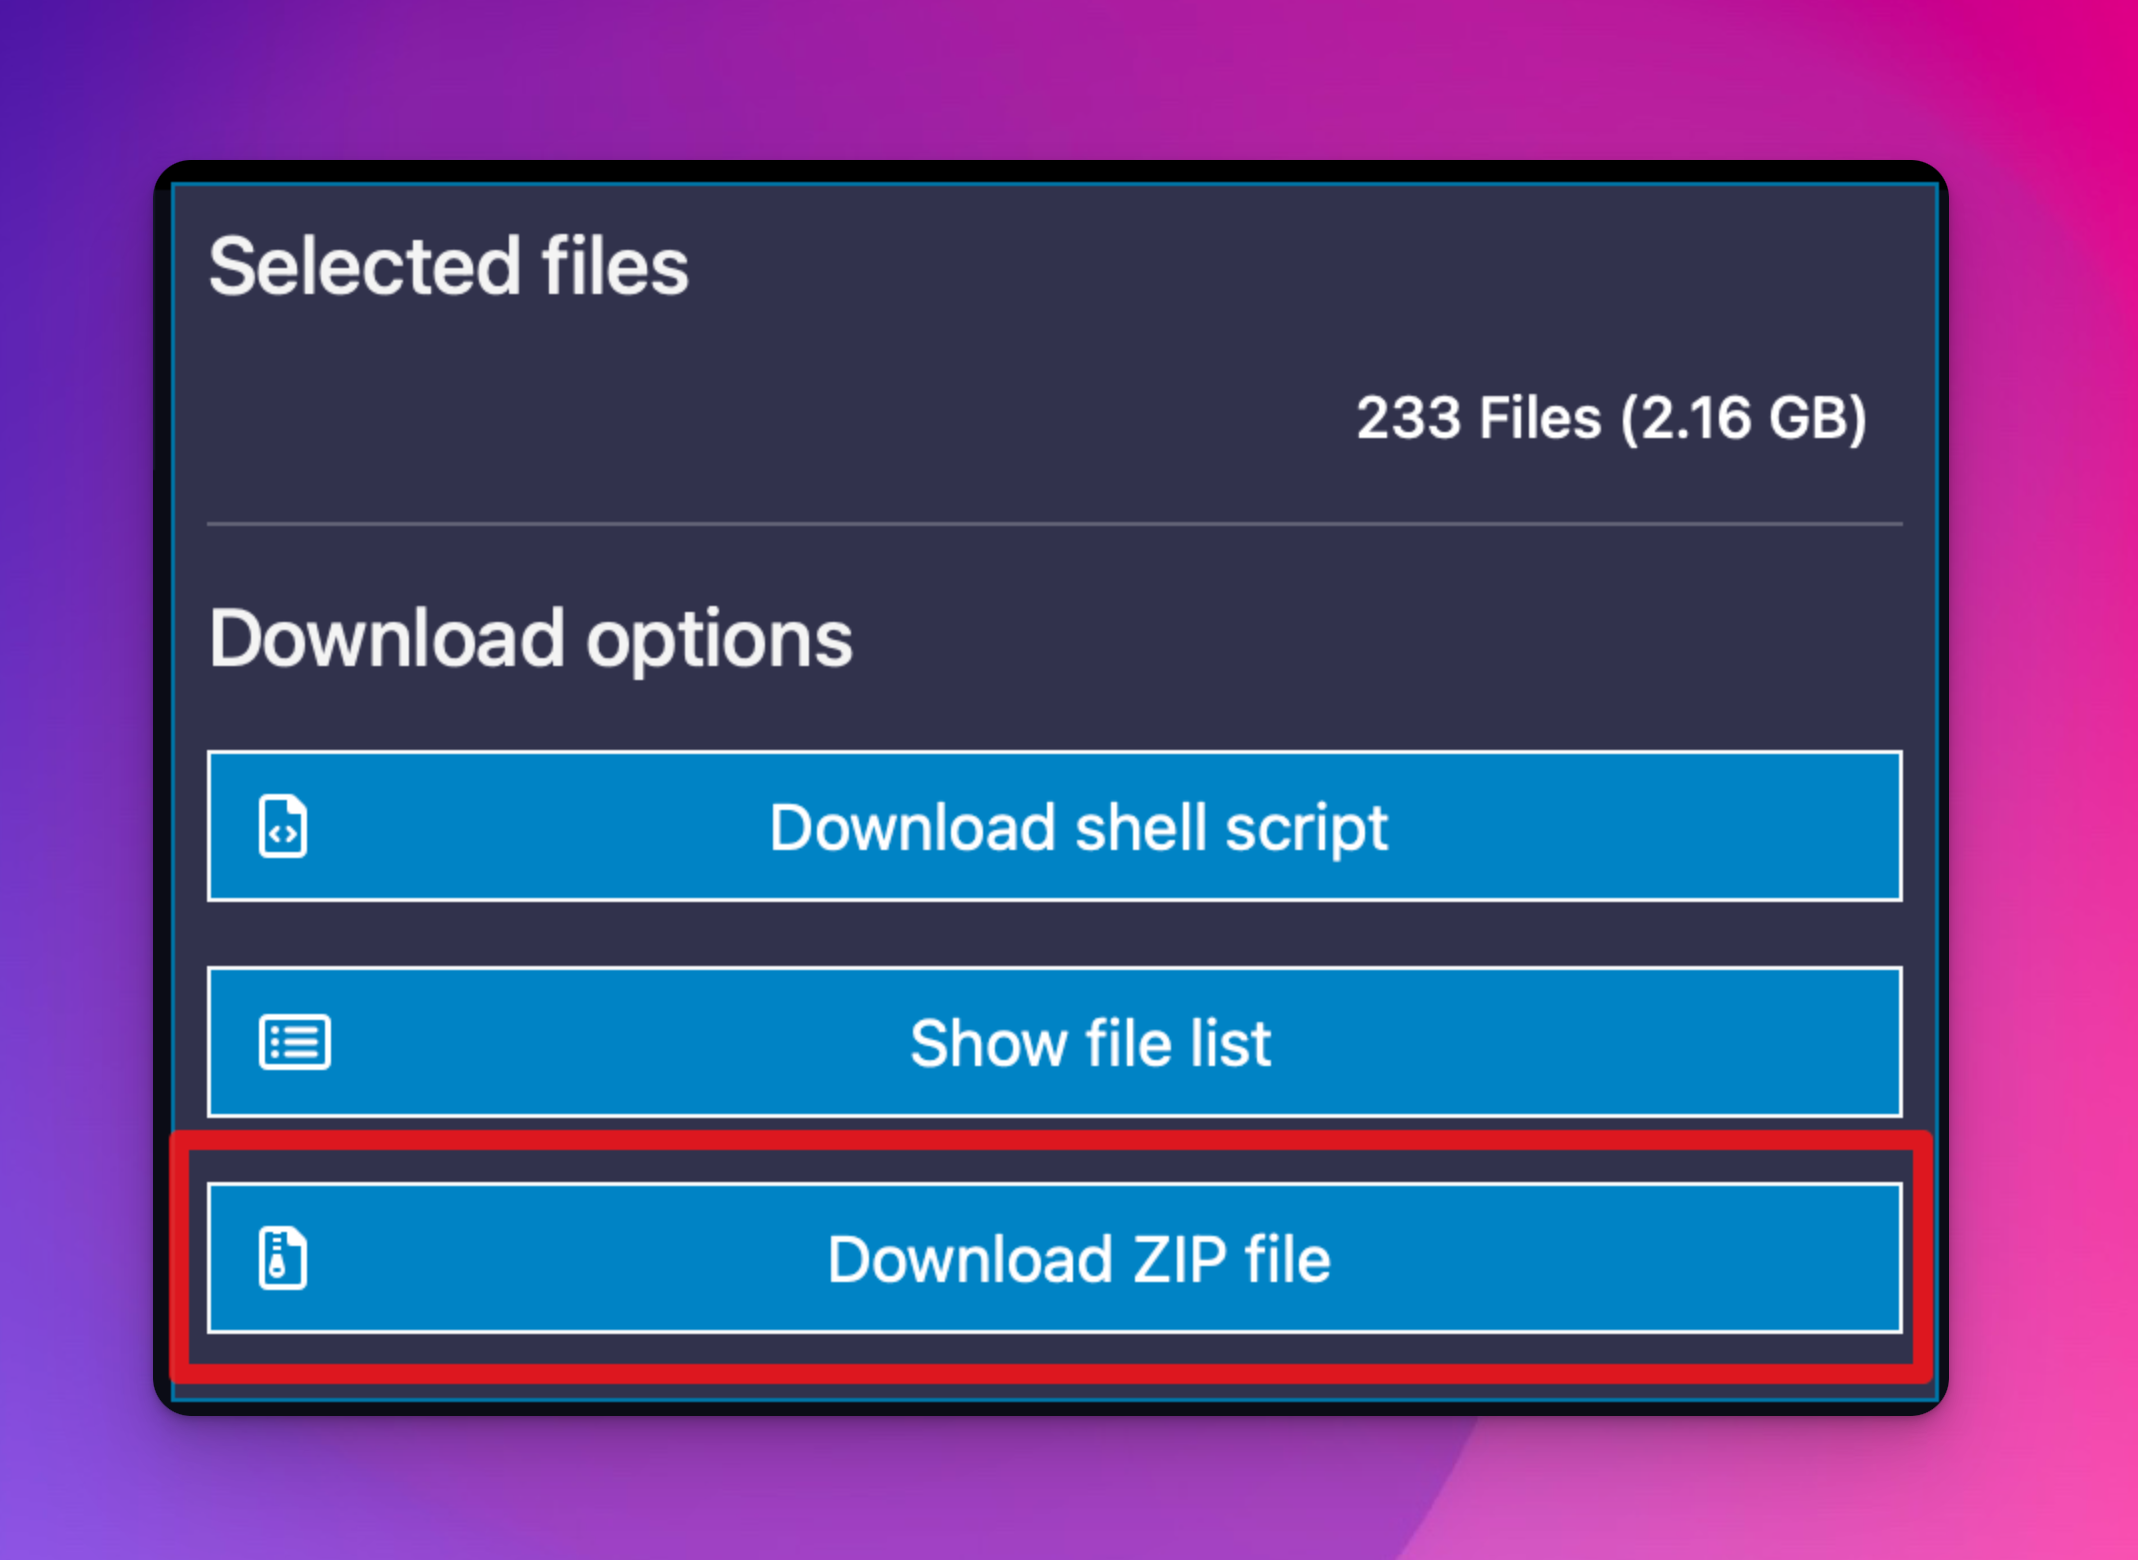
Fig. 3 Download the data by clicking the ‘Download ZIP file’ button.
Preparing the Data-Reduction Workspace
Now that you have a sample data set to work with, it is time to prepare the soxspipe-quickstart-demo workspace. Start by creating a soxspipe-quickstart-demo folder somewhere appropriate on your machine (like your Desktop or home directory).
mkdir soxspipe-quickstart-demo
Next, locate the data you just downloaded from the ESO SAF (typically in an ‘archive.zip’ file), unzip it, and move it to the soxspipe-quickstart-demo workspace.
Now, change into the soxspipe-quickstart-demo directory and run the soxspipe prep command:
cd soxspipe-quickstart-demo
soxspipe prep .
Once the workspace has been prepared, you should find it contains the following files and folders:
misc/: a lost-and-found archive of non-fits filesqc/: a directory to host the quality control data and plotsraw/: all raw frames to be reducedreduced/: a directory to host the reduced datasessions/: directory of data-reduction sessionssof/: the set-of-files (sof) files required for each reduction stepsoxspipe.db: an SQLite database needed by the data organiser; please do not deletesoxspipe.yaml: a file containing the default settings for each pipeline recipe
soxspipe reduces data within a reduction session, and an initial base session is automatically created when running the prep command. For a more detailed guide to preparing a workspace, please refer to the Preparing a Data-Reduction Workspace section.
Reduce the Data
In most use cases, you will want to reduce all of the raw frames contained within your workspace. To do this, run the command:
soxspipe reduce all .
The reduce command stops when all data within the workspace has been reduced. For a more in-depth guide to using the reduce command, please refer to the Reducing Data section.